In this page, we will walk you through the process of setting up SAML in Azure, enabling you to establish single sign-on (SSO) capabilities for your applications and services.
PrerequisitesTo be able to follow this guide you need to have access to Azure Portal. You also need a Federation Metadata file sent to you from Ebbot. Please contact us to request the file.
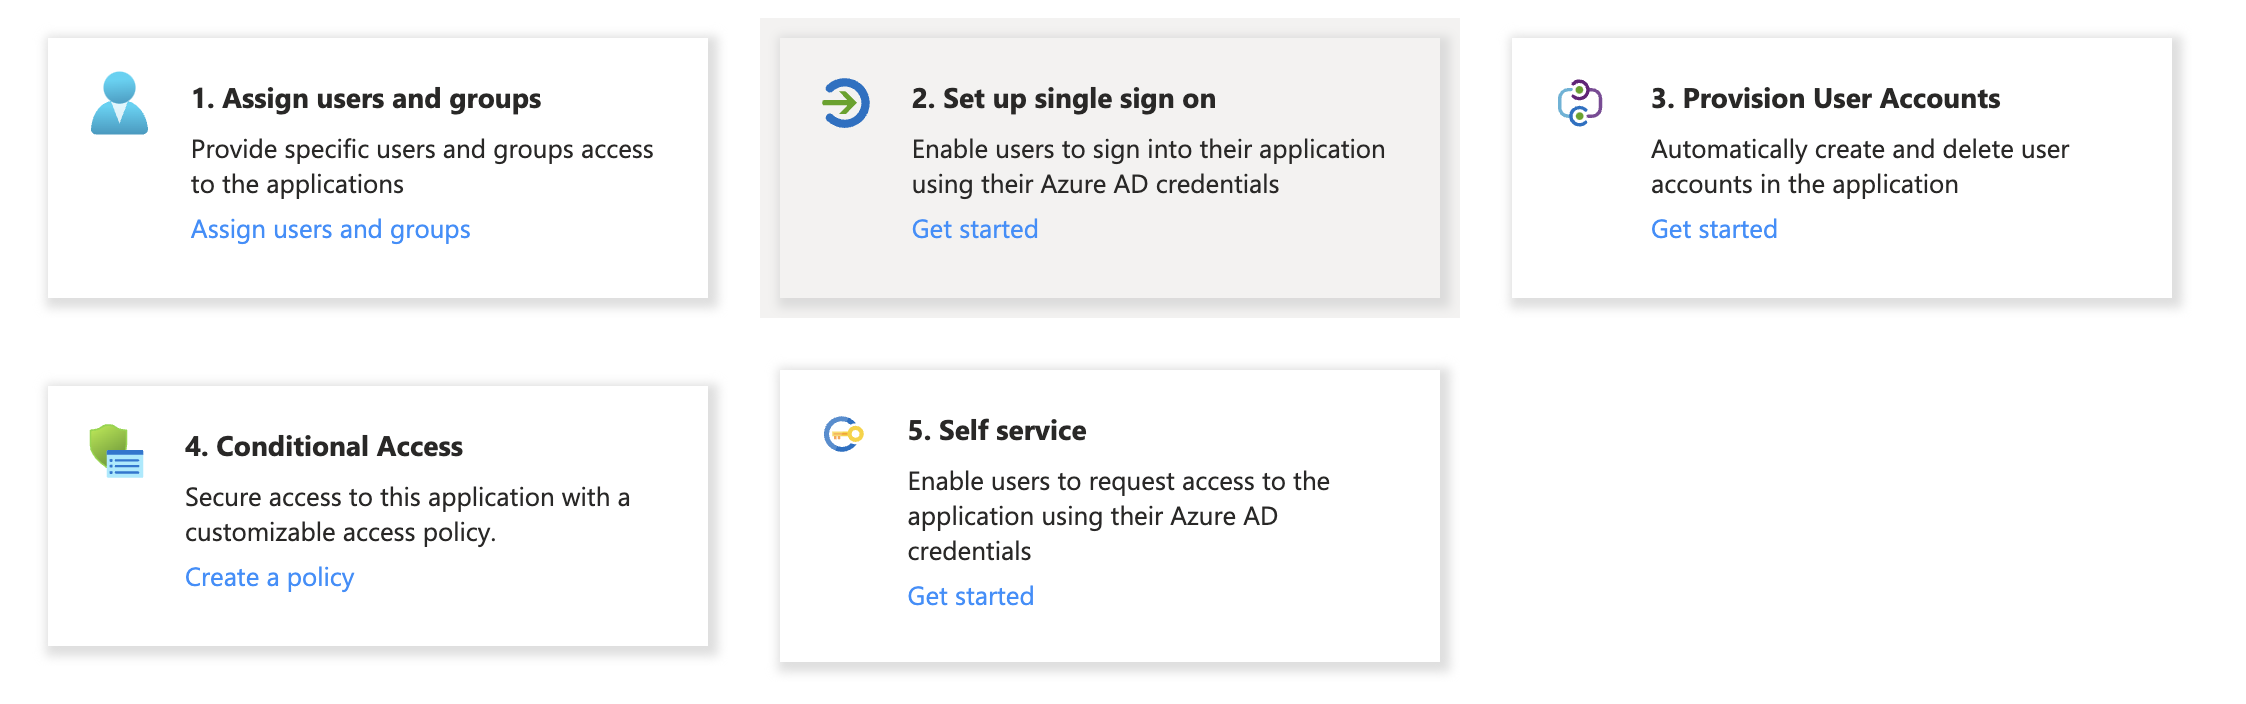
Add an enterprise applicationTo add an enterprise application to your tenant:
- Go to Azure portal and sign in using your account.
- Browse to Azure Active Directory and select Enterprise applications.
- Click on New application -> Create your own application.
- Give the app a name.
- Select Integrate any other application you don't find in the gallery (Non-gallery).
- Click on Create.
Click on Set up single sign on and choose SAML at the next step.
 On the next step you need to configure the Basic SAML Configuration. Our recommendation is to upload the metadata file but you can also configure it manually if you like.
Attributes & Claims
You need to configure the following attributes.
Information needed by Ebbot
As a last step you need to provide Ebbot with some information to be able to finish the configuration.
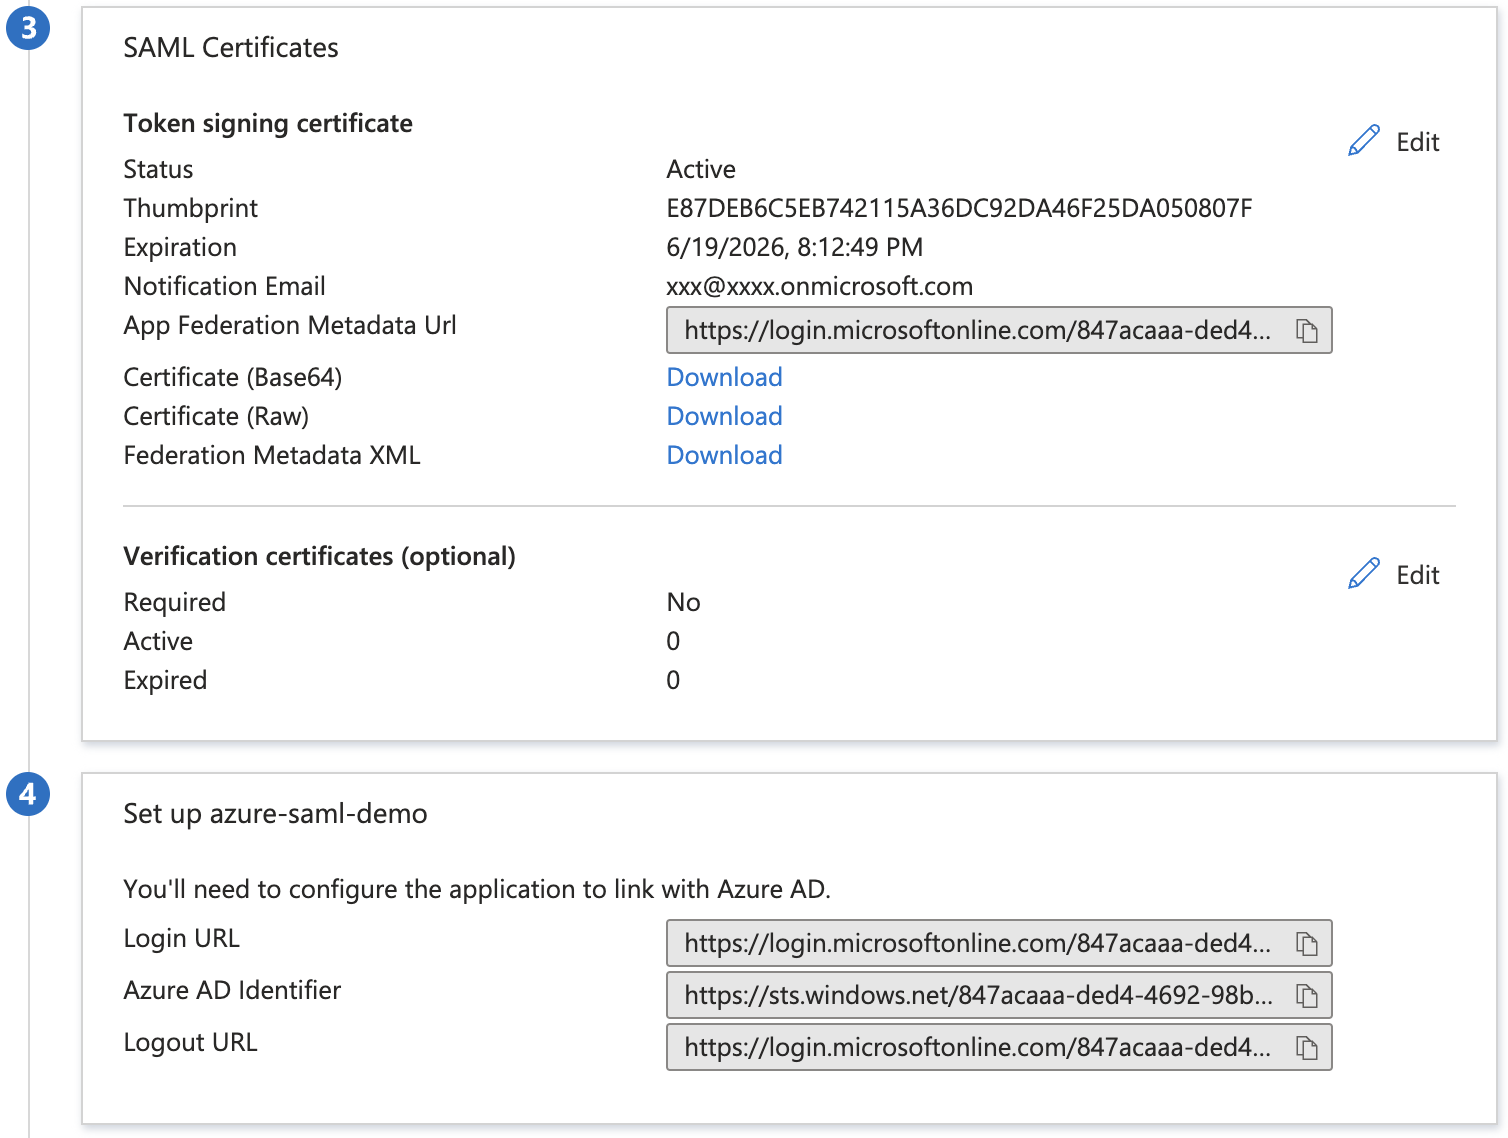
Provide Ebbot with the following information.
- App Federation Metadata URL
- Login URL
- Azure AD Identifier
- Logout URL